If you’ve ever dreamed of designing your own home but didn’t know where to start, you’re not alone. Many beginners feel that moment of hesitation before facing a blank 3D canvas. Yet, with Roomtodo, that uncertainty soon melts away. Its intuitive tools smoothly lead you from empty space to a lifelike digital home — one that seems almost ready to step inside.
You don’t need design experience or expensive software — just an idea of the place you want to create. Roomtodo makes it easy to draw, furnish, and explore your project in 3D, so you can see how imagination takes shape right before your eyes.
In this guide, we’ll walk through each stage together, from your very first project setup to a full virtual tour of your home. By the end, you’ll see that planning in 3D isn’t complicated — it’s creative, practical, and surprisingly fun.
Step1: Sign up and get comfortable
Click the button to create a free account. Once you’re logged in, choose Create new project, name it, and you’re all set to start a step-by-step home design of your dreams. If it’s your first time, make a simple room or a small house layout — it’s the easiest way to get the hang of the tools and enjoy the process.

Step 2: Draw your floor plan
Now the creation begins — it’s time to shape your house.
Begin by Start from scratch — this opens an empty workspace where you can build your project from the ground up. Then, choose Draw walls. This opens the tools for building your floor plan. Select Wall to draw individual walls one by one: click to place the starting point, continue outlining the room, and Roomtodo will show the measurements as you draw. After the lines connect, your walls form a clean structure you can adjust at any time.
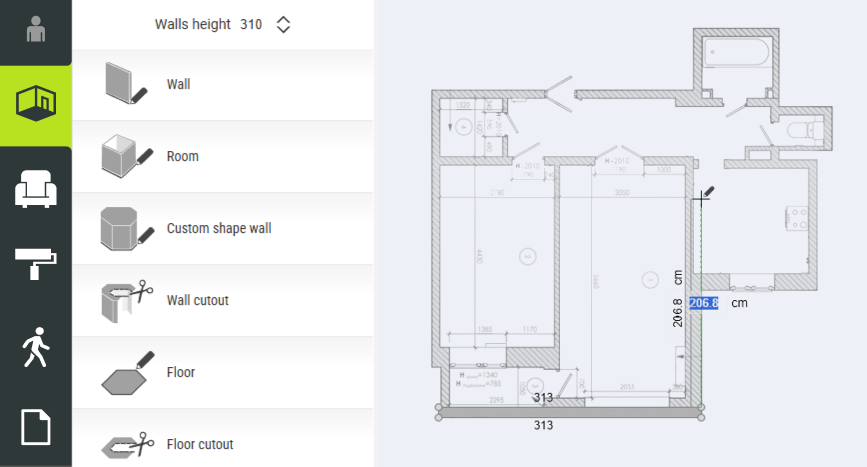
If you prefer a faster start, select Room. This tool lets you create an entire room in one click — simply choose the shape and size, then drag it into place. You can still fine-tune every wall afterward by moving or extending it to match your design.
Don’t want to draw from scratch?
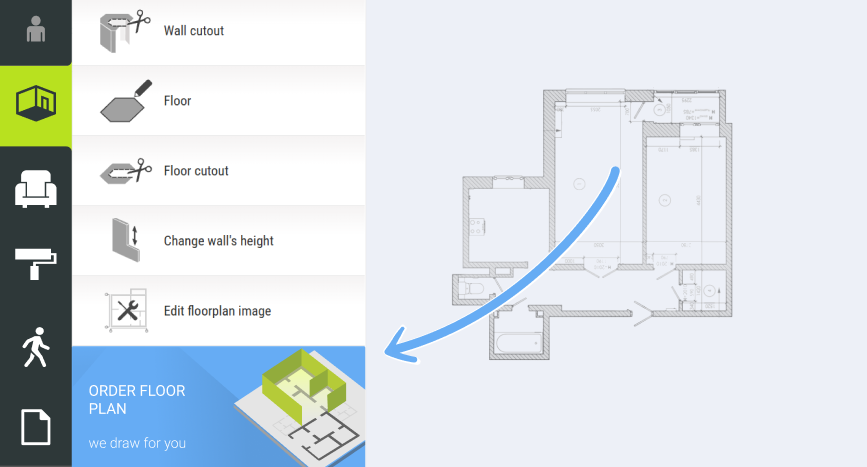
If you already have a floor plan or a hand-drawn blueprint, you can simply upload it and use it as a guide while tracing the layout in the 2D editor. But if you’d rather skip that stage entirely, there’s an even easier option: Roomtodo’s team can do it for you. Send us your blueprint through the Order Floor Plan service, and within about 24 hours, they’ll turn it into a ready-to-edit 3D model. Once you receive it, the 3D model appears directly in your Roomtodo account, so you can continue customizing it by placing furniture, materials, and decor.
Step 3: Add doors, windows, and openings
Now that your rooms are in place, it’s time to make them livable.
Head to the Objects tab and open the Doors and Windows category. From there, you can simply drag and drop elements onto your walls. They’ll automatically snap into position, perfectly aligned and to scale.
If your plan includes larger areas, like open kitchens or living rooms, don’t forget to include wide openings or arches instead of traditional doors. They can make your virtual home feel more open and airy, just like in real life.
Step 4: Mix and match
Head to the Materials section to explore a wide range of wallpapers, floor finishes, and textures — from warm wood planks to sleek tiles or patterned designs. Small changes can completely transform the mood of a room, making it bright or elegant, dynamic and free-spirited, or classical and soft. You can also combine materials to highlight different areas, like a cozy zen nook with natural wood flooring or a stylish kitchen corner with metal accents.
Step 5: Furnish and decorate your rooms
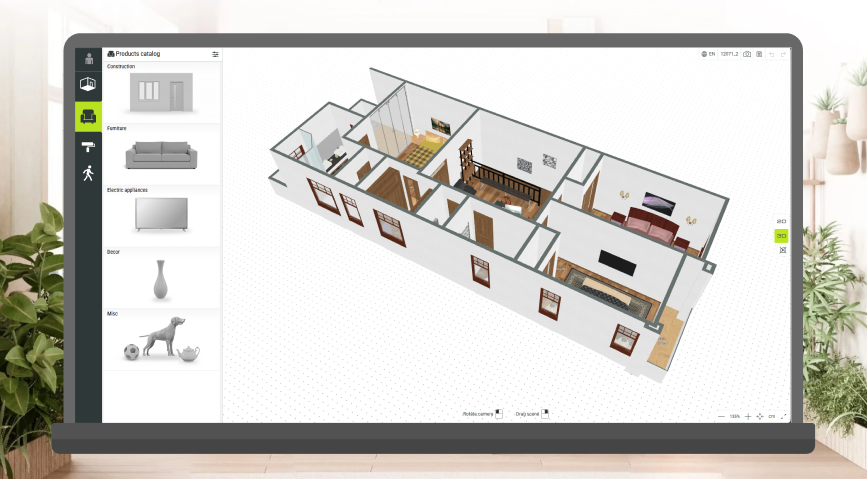
This is the part where your house starts to feel like a home. When the structure is ready, switch to the Objects tab again and explore all the different furniture categories — Living Room, Bedroom, Kitchen, Bathroom, and more.
Everything works with simple drag-and-drop actions: just pick a sofa, table, or lamp and place it wherever you want. You can rotate items, move them around freely, and even adjust their size until the proportions look right.
Roomtodo 3D planner lets you discover countless styles, materials, and colors. Prefer a soft floral carpet over an abstract print? Simply switch it. You can instantly update your home interior — from wall paints and flooring to decor — to try out any design, whether it’s minimal and modern or rustic and bohemian.
Step 6: Visit your home in 3D
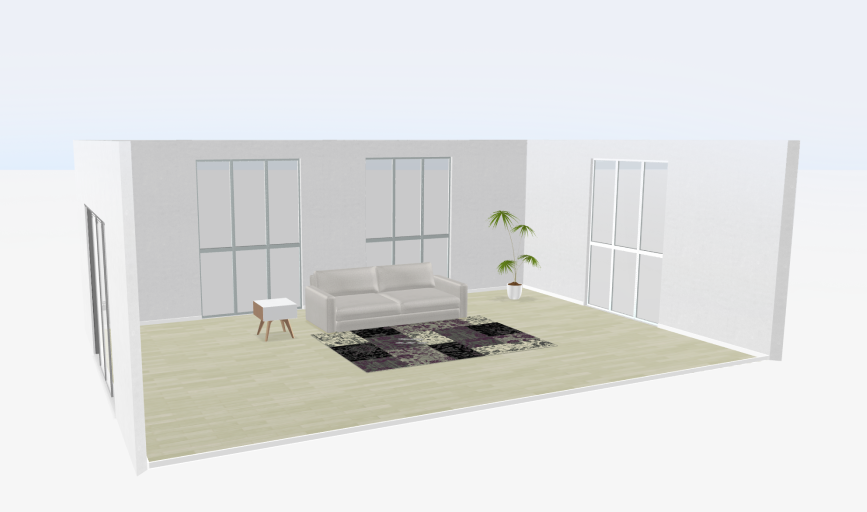
This is the most fun part — coming inside your virtual home! Switch to 3D view and use your mouse or arrow keys to walk through the rooms. A 3d home walkthrough is the best way to check proportions: are doorways wide enough? Is furniture spacing comfortable? Does everything feel balanced together?
Adjust the camera to a person’s eye level to get a realistic sense of space. With Roomtodo, you can explore your design immersively for a clear, vivid view of your future environment. The 3D mode shows true scale and textures — from the floor patterns to the finishes — helping you notice details that are easy to miss in 2D. You can see how furniture interacts with walls and windows, how the items work in real life from every angle, and whether the overall composition feels natural. This vision helps you make confident decisions before construction begins and choose the right style from the very start.
Step 7: Save, share, and edit later
That’s it — your first 3D house is done! You’ve just gone from a blank canvas to a walkable 3D home, all in a single tool. Now, click Share to send a link to your friends. You can always come back later to add new rooms, try out other materials or completely change your layout: just save the versions regularly, so you’ll never lose your work.
